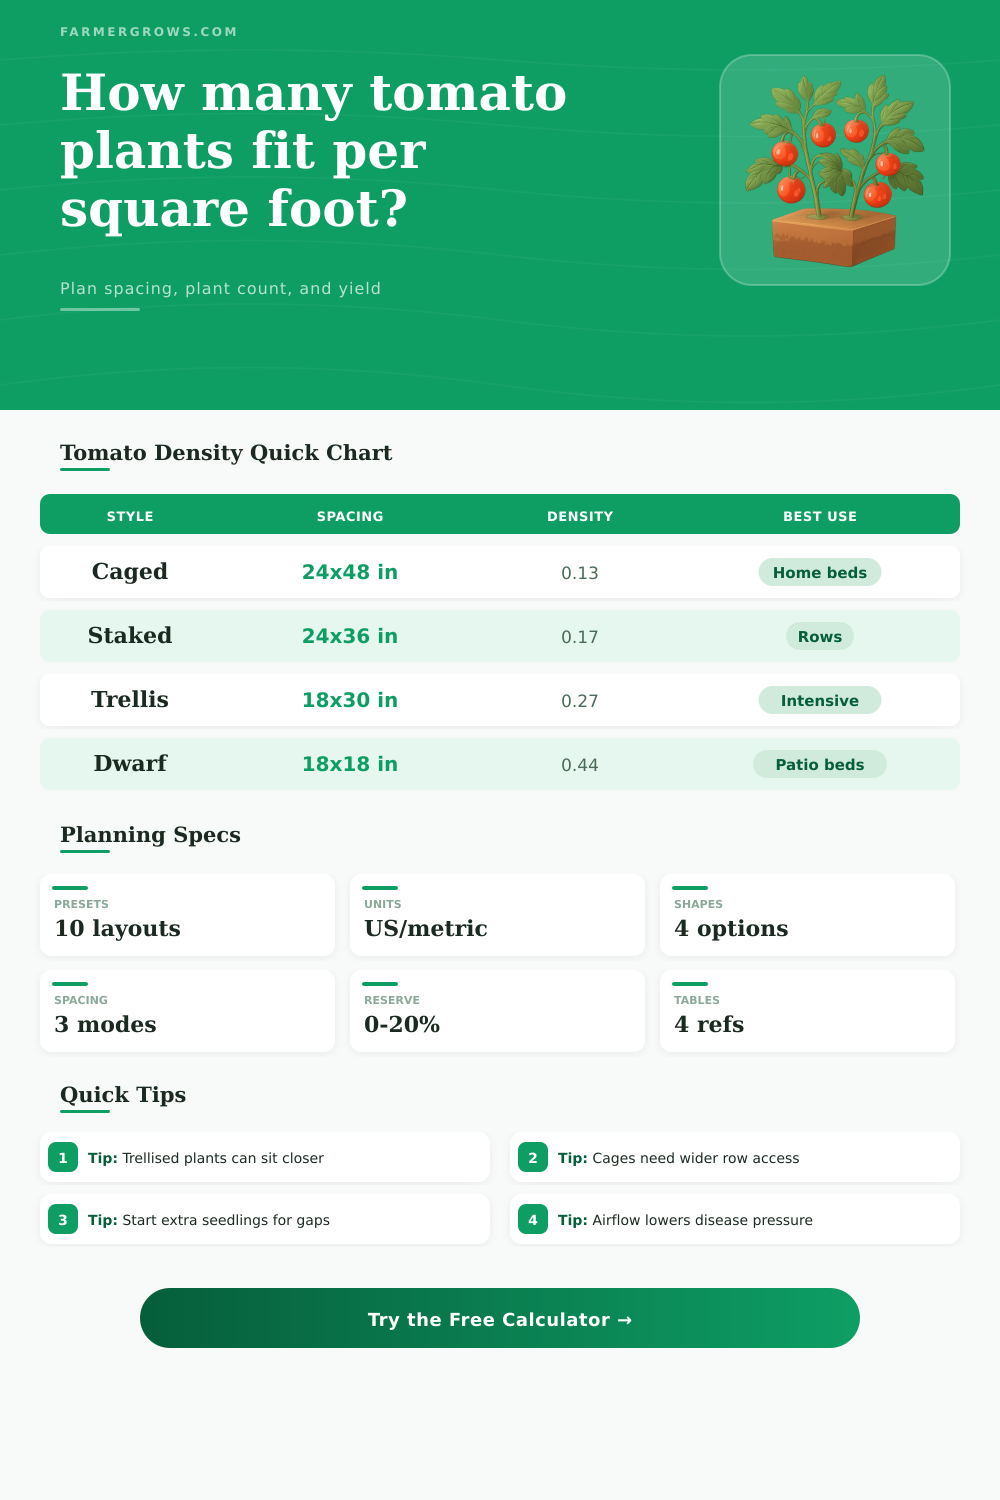
Tomato Plants Per Square Foot Calculator
Estimate tomato plant density, total plants, seedling extras, row layout, trellis pressure, and harvest range for raised beds, field rows, containers, and high-intensity trellises.
Use this planning tool before transplanting tomatoes. It converts your bed shape and spacing style into plants per square foot, transplant count, extra seedlings to start, and a realistic harvest range tied to tomato type and pruning method.
Tomato Planting Density Plan
Use these numbers to mark transplant spots, start enough seedlings, and compare your spacing against the growing style you selected.
| Growing style | Typical spacing | Plants per sq ft | Best fit |
|---|---|---|---|
| Indeterminate in cages | 24-30 in plants, 42-48 in rows | 0.10-0.17 | Home gardens where airflow and easy picking matter. |
| Staked indeterminate | 18-24 in plants, 30-42 in rows | 0.14-0.32 | Garden rows, small farms, and beds with sturdy stakes. |
| Single-leader trellis | 12-18 in plants, 24-30 in rows | 0.27-0.50 | Managed pruning, string trellis, greenhouse, or high tunnel crops. |
| Determinate bush tomatoes | 24-30 in plants, 36-48 in rows | 0.10-0.17 | Paste tomatoes, processing blocks, and short-season flush harvests. |
| Dwarf or patio tomatoes | 12-18 in grid or containers | 0.44-1.00 | Compact raised beds, large pots, and balcony planters. |
| Cherry tomato trellis | 18-24 in plants, 36-48 in rows | 0.13-0.22 | Vigorous vines that need tying, pruning, and harvest visibility. |
| Plant x row spacing | Sq ft per plant | Plants per sq ft | Plants per 100 sq ft |
|---|---|---|---|
| 12 x 24 in | 2.0 | 0.50 | 50 |
| 18 x 24 in | 3.0 | 0.33 | 33 |
| 18 x 30 in | 3.8 | 0.27 | 27 |
| 24 x 36 in | 6.0 | 0.17 | 17 |
| 24 x 48 in | 8.0 | 0.13 | 13 |
| 30 x 60 in | 12.5 | 0.08 | 8 |
| Project | Usable area | Spacing plan | Approx plants |
|---|---|---|---|
| 4 x 8 raised bed | 27 sq ft at 85% | 18 x 24 in trellis | 9 plants |
| 4 x 20 trellis bed | 72 sq ft at 90% | 18 x 30 in | 19 plants |
| 10 x 20 garden block | 170 sq ft at 85% | 24 x 36 in | 28 plants |
| 3 ft round planter | 7 sq ft at 100% | 18 in dwarf grid | 3 plants |
| 50 ft field row strip | 200 sq ft at 80% | 30 x 60 in | 16 plants |
| Tomato type | Support need | Density risk | Harvest note |
|---|---|---|---|
| Large slicer | Strong cage or stake | Cracking and disease if crowded | Fewer plants can still yield heavily. |
| Paste determinate | Cage, stake, or low weave | Leaf humidity in tight blocks | Often produces a concentrated flush. |
| Cherry indeterminate | Tall trellis or heavy cage | Can become tangled quickly | Long season harvest if picked often. |
| Dwarf tomato | Short stake or cage | Root volume limits in containers | Useful where space is limited. |
| Greenhouse single leader | String trellis and clips | Needs pruning discipline | High density works with management. |
Match density to pruning. A single-leader tomato can use less ground area than an unpruned cage plant. If you will not prune weekly, choose wider spacing than the tightest chart number.
Leave working room. The plants per square foot number is only useful if you can still water, tie, inspect leaves, and harvest without breaking stems or trapping humid air.
Probably the first thing you did was grab some seedlings at nursery because they were pretty in their packets. Then you made a rough estimate of how much space was available behind your garage and sketched out a plan on a napkin. Three weeks into it, the vines is tangling up and you’re realizing nothing is going to be harvestable without bumping into something, or else you’ll need to break off part of it.
Spacing is one of most important variables in growing tomatoes. It’s an abstract concept until you scrape your shins on foliage that should of been removed (and isn’t). Planting time means get-it-right-now time, so you won’t regret lack of air flow come summer when diseases set in. Plants per square foot isn’t really about packing bodies into a box; it’s about controlling light penetration and air flow.
Why Tomato Spacing Is Important
When you pack indeterminates (plants that continue to produce endlessly till frost) together, for instance, you form a moist microclimate within the canopy. Humidity is the blights friend. Those narrow gaps where no sunlight can reach are prime habitat. The calculator, above, will do the density arithmetic for you, leaving you free to think about biological implications of what you choose. Input your desired spacing and bed shape, and it’ll tell you how much you can fit while avoiding a fungal petri dish of a garden.
Cages work well, and are what most home gardeners will grow in. But with cages, we must be generous about how many tomato we put into them. The cage spreads out, which requires plenty of aisle space for harvesting. You also want to allow space for big-slicer fruits that dangle down without touching ground. For example, when caged, you’ll want perhaps only one plant per seven or eight square feet. A wasteful-looking arrangement, until you recall: A well-grown tomato produces more fruit then a stressed one. Remember, you’re paying for each vines potential harvest, not its soil space.
Getting trellised really alters things. If you train each leader up as a single vertical, supported with twine or some other string tied around just its main stem, you can tighten it a lot, especially if you keep at the suckers. The plant will be tight and narrow because fewer suckers mean less bushiness. This allows you to plant them much closer together, such as maybe one every couple of feet if your air flow is good and you are super-disciplined about pruning. Not a low-key thing, but you get more fruit per square foot, since the plants energy isn’t going into making leaves but fruits. Here’s how it breaks down, laid out nicely in the reference table on the page. Different kinds of support mean different densities.
For smaller areas there are also dwarf varieties. Dwarf tomatoes require no heavy pruning, no trellis, and they’ll tuck right into your tight raised bed or container. Their canopy is controlled and their root system are compact, allowing you to plant in a grid, very close together compared to standard hybrids. If you’ve got lots of vertical room in pots but limited ground area, this is a good one. Keep in mind: Containers dry out more quickly, meaning water will be the limiting factor, not available space.
And remember: Plan for yourself! How are you going to reach in there to pick those tomatoes that start to rot on the vine, or tie up those plants’ stems, or water them? Plan for walking around. There may be obstructions like trees to account for. You also need to consider edge areas and areas where you’ll have pathways. Use the tool to adjust for usable space. This allows you to plan for these things, rather than planning as if each inch of soil can hold a plant. Doing that will just result in a maze you cannot possibly maintain. Plan for access to your crop. It’s not wasted space; it’s access to your food. Plan to leave working room.
Start some extras. Some seedlings will fail to make it through transplant shock, or fall victim to early pest pressure. Ten percent reserve is smart insurance against gaps that let in too much wind or look bare.
So what does all this mean? It’s about planning: planning for what is possible versus what you want to do, and finding a balance between the two. Are you happy with daily pruning and close attention to humidity levels so you can fit slightly more into a space? Most of us would rather enjoy our tomatoes than have a full-time tomato-growing job. Choose your desired spacing according to how much maintenance you’re prepared to do. The closer together the plants grow, the more up-to-the-minute maintenance is required (more crops if you keep at it). But the farther apart they go, the easier and the healthier your crop will be.
Knowing these figures in advance helps you avoid crowding later in the season, no surprises! Your napkin drawing was a great beginning; now we know where the real plan comes in: How much room do those plants need to breathe?