Rose Cutting Root Time Calculator
Estimate when rose cuttings should show first roots, when they can be potted up, and how many starts are likely to survive from your exact propagation setup.
Start with a common rose propagation situation, then adjust the wood stage, rooting mix, temperature, humidity, and cutting size to match your tray or bottle dome.
Rose Cutting Rooting Estimate
Adjust the inputs to estimate rooting time, pot-up date, and batch survival.
Good balance of humidity and air when the mix drains freely and the cover is vented daily.
Excellent aeration for semi-hardwood rose cuttings; needs steady moisture and bright shade.
Roots are easy to see, but water roots can stall after transplanting into potting mix.
Hardwood canes are simple outdoors in cool seasons, but rooting commonly takes months.
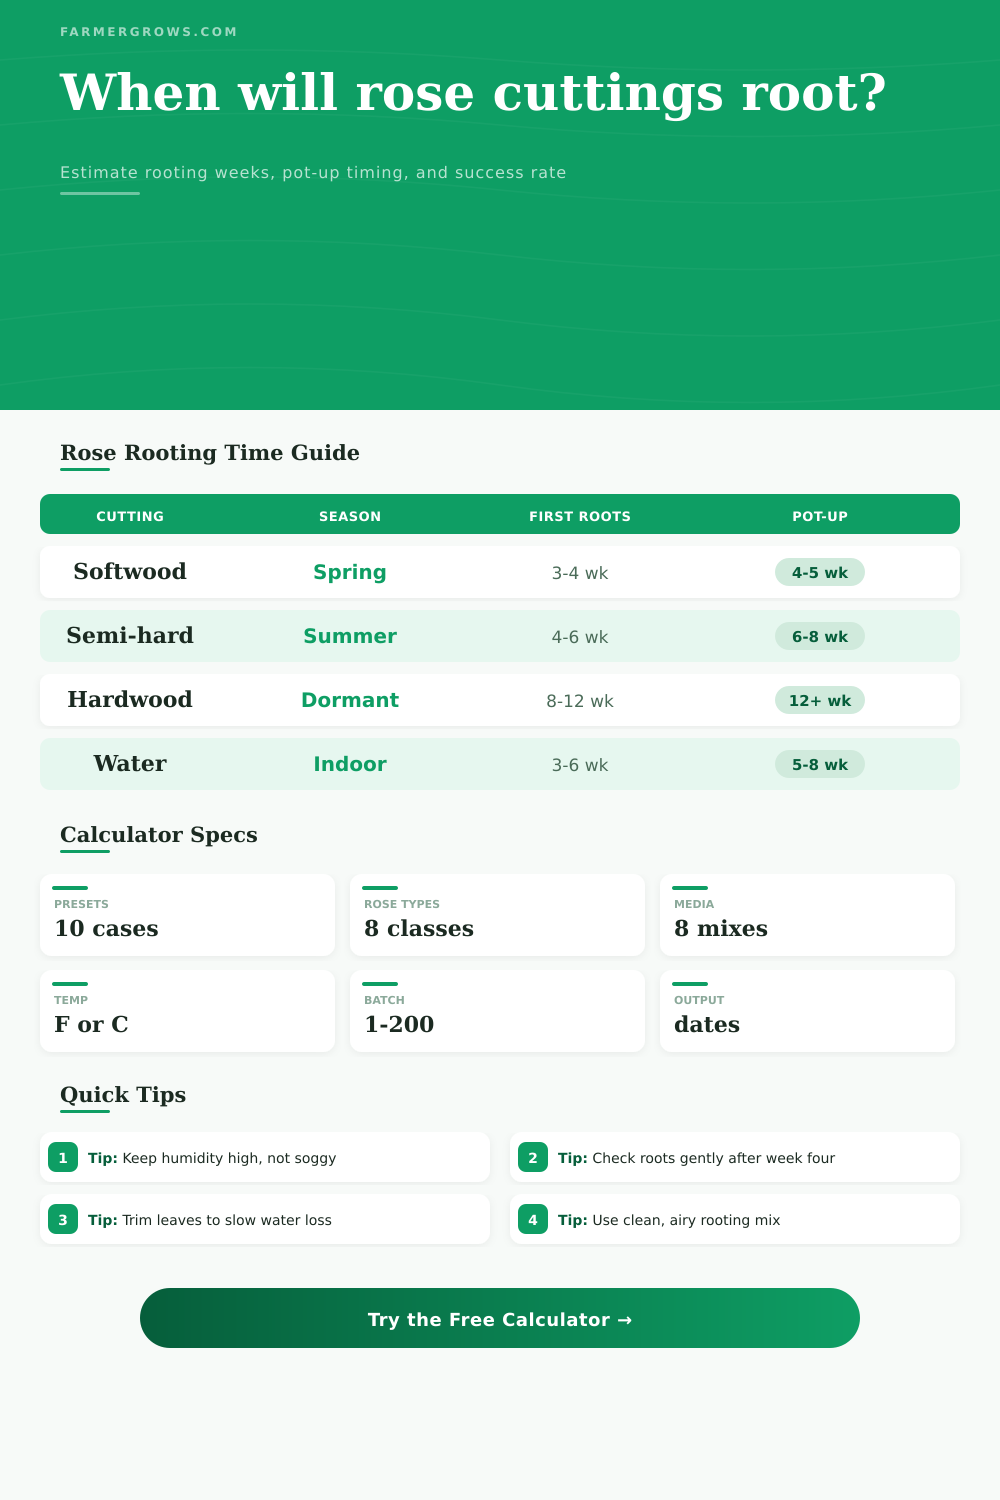
| Cutting stage | Best season | Typical first roots | Pot-up timing |
|---|---|---|---|
| Softwood green tip | Late spring to early summer | 3 to 4 weeks in warm humidity | 4 to 6 weeks if roots hold the mix |
| Semi-hardwood after bloom | Early to midsummer | 4 to 6 weeks for many shrub roses | 6 to 8 weeks after stronger roots form |
| Dormant hardwood cane | Late fall through winter | 8 to 12 weeks or longer | Spring growth or a firm rooted liner |
| Water-rooted stem | Indoor trial any time | 3 to 6 weeks when stems stay fresh | After 1 to 2 inch roots, with gentle transition |
| Condition | Target range | Too low | Too high |
|---|---|---|---|
| Root-zone temperature | 70 to 75°F / 21 to 24°C | Callus and roots slow below the mid 60s | Heat above 82°F raises wilt and rot risk |
| Humidity around foliage | 85 to 95% | Leaves wilt before new roots can supply water | Sealed wet air can invite fungus and leaf drop |
| Light exposure | Bright indirect light | Dim light slows energy production | Direct sun overheats domes and dries leaves |
| Moisture in medium | Moist but airy | Dry pockets stop callus growth | Soggy media cuts oxygen around the basal end |
| Medium or method | Rooting speed | Rot risk | Best use |
|---|---|---|---|
| Perlite plus peat or coir | Fast to moderate | Low when drained | Most home rose cuttings under a dome |
| Sharp sand | Moderate | Low to medium | Outdoor boxes and dormant material |
| Sterile seed-starting mix | Moderate | Medium | Small batches where moisture is watched |
| Water jar | Variable | Stem rot if water fouls | Observation trials, not the strongest liners |
| Garden soil | Slow | High | Hardwood outdoor sticking only when drainage is good |
| Milestone | Softwood | Semi-hardwood | Hardwood |
|---|---|---|---|
| Callus swelling | 10 to 18 days | 14 to 24 days | 4 to 8 weeks |
| First gentle tug resistance | 3 to 4 weeks | 4 to 6 weeks | 8 to 12 weeks |
| Pot-up readiness | 4 to 6 weeks | 6 to 8 weeks | 12 weeks or spring |
| Begin venting cover | After new roots | After new roots | After active shoots |
Use rooting time as a window, not a tug test schedule. Tugging too early breaks new white roots. Check moisture and leaf condition first, then inspect one sacrificial cutting if the batch is large enough.
Match humidity with airflow. Rose cuttings need humid air before roots form, but sealed wet domes can rot leaves. Crack covers briefly each day and remove fallen leaf pieces.
So you begin with a healthy shrub rose such as a Knock Out, for instance, and it seems that all you need do is snap a stem and poke it into the soil to take a cutting. Seems intuitive, right? Nature does it, after all. It will simply grow.
Wrong. That’s when the guessing starts…and waiting isn’t a strategy either. The brown, mushy stick or a real, rooted plant often depends on conditions and timing, not magic. Use the calculator up top. Once you enter the variables (humidity, temperature, wood stage), it figures out the rest of the math for you. This saves you from guessing at fuzzy timeline.
How to Grow Roses from Cuttings
Knowing where you’re starting also helps. If your cutting is green and flexible (and full of water, but not necessarily any strong cell to support it for long), then it’s probably a softwood taken in spring. If it’s firmer, like the one above (after the spring blooms has faded), then it’s a semi-hardwood cutting.
A softwood will root quickly if it roots at all, but it will rot right away. A semi-hardwood has the strength of stem to sustain the shock of being separated, plus some stored energy in its stem to fuel root formation until the newly formed roots themselves can absorbs moisture. This makes semi-hardwood take maybe a week or two longer to show signs of rooting than a softwood does (but the roots tend to be stronger and more reliable). The table on the page shows it laid out.
More important: It’s not the light that counts as much as its the warmth of the soil. Even with excellent light, you’ll fail if the ground is cold, because rose roots form best when the soil in which they are growing is also about seventy to seventy-five degrees F. The air temperature can be different than, but the soil must be warm to prompt cell division at the base of the stem.
If you’re rooting some cuttings in early summer out in a cool spot on the porch, those stems will sit there month after month and do nothing. The secret weapon is to keep the soil medium warm. Here, either a south-facing wall or a heat mat does most of the work.
The other part of that equation is humidity. How does a cutting without leaves make food? How does a cutting with too many leaves manage water intake compared to how much it loses through transpiration (water loss), especially when it has no roots yet? The secret: Keep the air around those leaves almost damp; don’t let them get dry. A plastic bag will do it. Or better yet, a dome. Not wet, just humid.
There is such thing as a swamp vs. High humidity, and you want one but not the other. You want the medium to be moist enough to touch but then for water to run right out of it. That’s why peat/perlite mixes are popular: they holds some but also allow air down to the bottom of the stem. Fungus moves in if the leaves or the medium is actually sitting in water. You want it moist, but not a swamp.
Also be realistic about how many cuttings you’ll have to work with at once. Don’t assume that if you snip off a dozen stems, they’ll all make it. Some won’t, even in ideal conditions. The success estimate provided by the calculator is calculated from your input. That’s why you use it: To plan. Want five plants? Try for 20 cuttings. Sounds like overkill? This is true until you remember that clipping off a stem saves you way more time, and money, than buying a similar-looking plant from the nursery.
Gently feel around for roots. Don’t pull on the stem daily. Pulling breaks the fine, tender white threads that are being produced at the base. Once you think enough time has passed, try gently lifting one cutting to see if it comes up easily. If not, let it alone. That’s what all those others need, quiet time to set down roots.
Once they’re potted, harden them off next. Their new roots is tender and they’re accustomed to high humidity. Plunk them straight into the outdoors in dry soil and they will die. Take things slow with them and get them used to the real stuff. Leave the plastic lid up an hour a day, then two, then overnight. Get them used to the real air.
The hardest thing is patience. It’s an all-or-nothing thing. You want something now. But remember that the roots are in there, even if you can’t see them. Believe me, it’ll let you know when it’s time. Wait until the estimated window passes before checking one cutting.
Moisten the medium well, keep things warm and humid. Let those stems do their job. The plant will signal when it’s good and ready, not just by roots but also by growing up out of there.