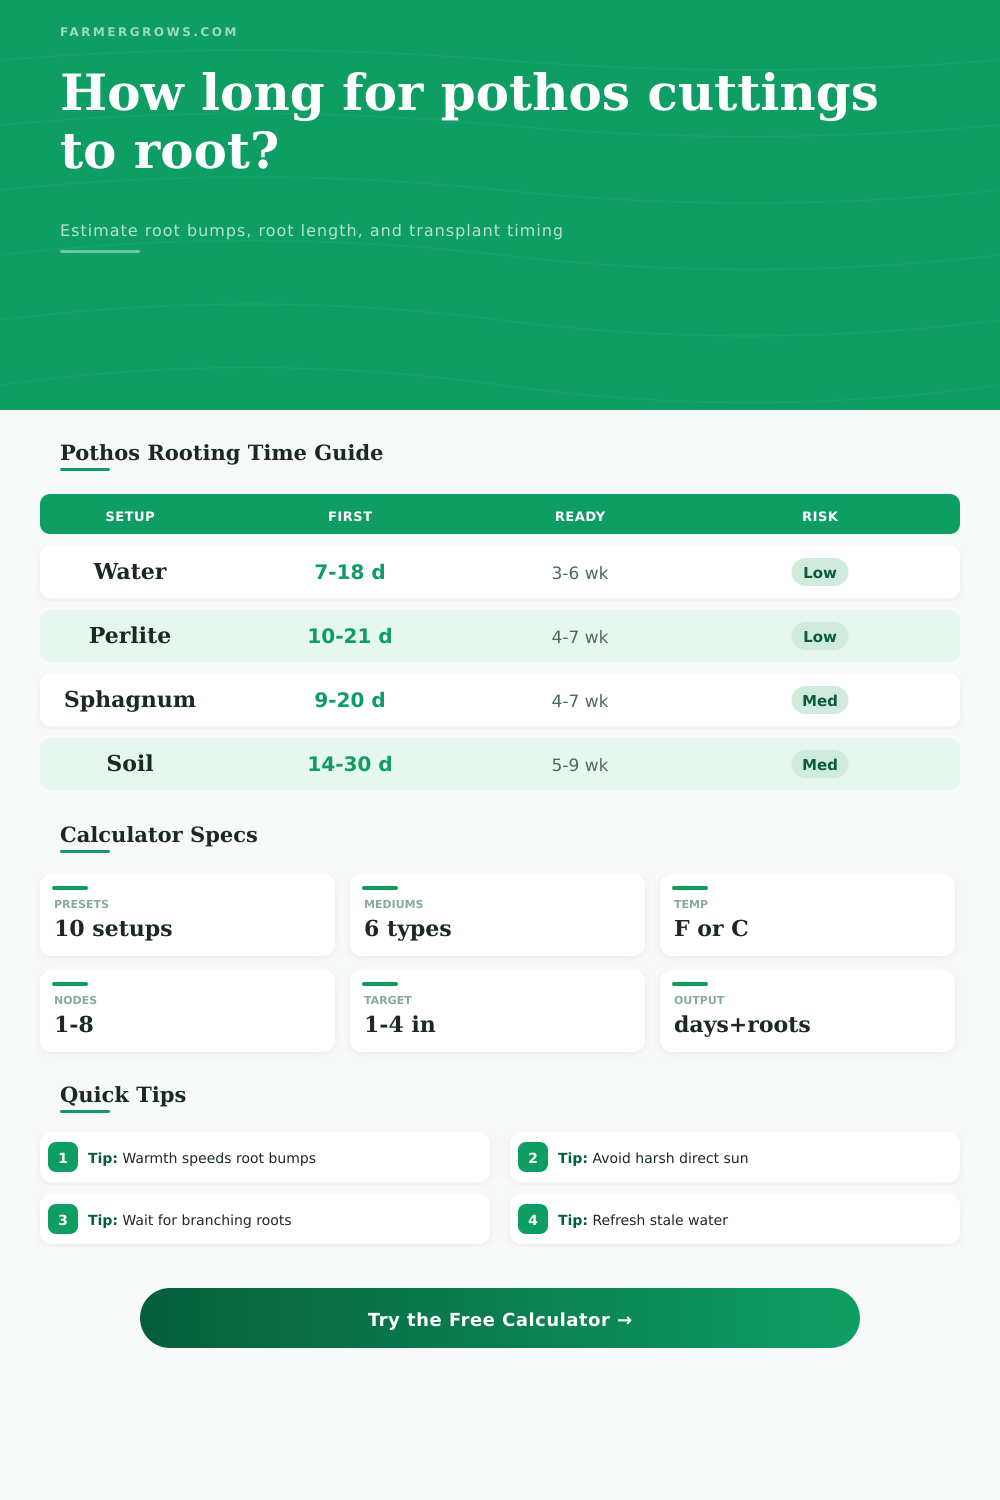
Pothos Cutting Root Time Calculator
Estimate when a pothos cutting will show root bumps, reach transplant length, and become ready for potting based on nodes, cutting type, medium, warmth, light, humidity, season, and cutting health.
Start with a real pothos propagation setup, then tune the node count, medium, warmth, light, humidity, and current rooting age to match your jar, tray, or starter pot.
Pothos Rooting Estimate
Your rooting forecast will appear here.
Easy to monitor root bumps and rot, but long water roots can need gentle potting after transplant.
Holds oxygen and moisture around nodes, making it a strong choice for firm, branching root starts.
Useful for wet sticks and small cuttings, as long as condensation is vented before stems soften.
Often slower to show progress, yet it avoids moving fragile water roots into a potting mix later.
| Rooting medium | First root bumps | Potting-ready roots | Best use |
|---|---|---|---|
| Clean water jar | 7 to 18 days in warm bright conditions | 3 to 6 weeks for 1 to 3 inch roots | Easy monitoring and beginner cuttings |
| Damp perlite | 10 to 21 days with steady moisture | 4 to 7 weeks for branching root tips | Airy rooting before soil transfer |
| Moist sphagnum moss | 9 to 20 days in a vented box | 4 to 7 weeks when roots cling to moss | Wet sticks and high-humidity starts |
| Light potting mix | 14 to 30 days, often hidden | 5 to 9 weeks with gentle tug resistance | Direct-to-soil propagation |
| Rinsed LECA | 12 to 24 days with water below nodes | 5 to 8 weeks for adapted semi-hydro roots | Growers keeping plants in LECA |
| Coco coir and perlite | 11 to 23 days when evenly damp | 4 to 8 weeks for fibrous root starts | Soil-like moisture with better air |
| Average temperature | Rooting pace | Expected effect | Care note |
|---|---|---|---|
| 60°F / 16°C or cooler | Very slow | Can take about twice as long | Move away from cold windowsills |
| 65 to 69°F / 18 to 21°C | Slow | Often adds 20% to 40% more time | Keep medium barely moist, not cold-wet |
| 70 to 74°F / 21 to 23°C | Normal | Typical home propagation timing | Bright indirect light is usually enough |
| 75 to 82°F / 24 to 28°C | Fast | Common sweet spot for root initiation | Check water level and humidity more often |
| 86°F / 30°C or hotter | Stress risk | Heat can offset faster metabolism | Increase airflow and avoid direct sun |
| Cutting type | Typical root time | Root potential | What to watch |
|---|---|---|---|
| Top cutting with active tip | Usually quickest when warm | Strong, because leaves feed new roots | Keep one node below the medium line |
| Mid-vine leafy cutting | Normal pace if nodes are plump | Good with two or more nodes | Trim excess vine to reduce leaf load |
| Single-node wet stick | Slower and less predictable | Moderate if the node is firm | High humidity helps but stale air hurts |
| Older woody vine | Often slower to initiate roots | Good once it wakes up | Check for firm tissue before waiting longer |
| Heavy white variegation | Can lag behind green cuttings | Lower stored energy | Use brighter indirect light, not direct sun |
| Readiness sign | Water cutting | Perlite or moss cutting | Potting decision |
|---|---|---|---|
| White root bumps only | Too early for most pots | Keep humidity steady | Wait unless rot is developing |
| Roots 1 inch long | Can pot small cuttings carefully | Usually safe if roots are firm | Use a small pot and airy mix |
| Roots 2 inches long | Good default transplant point | Good default transplant point | Water in gently after potting |
| Roots 3 inches plus with branches | Ready, but avoid tangling longer | Ready and usually resilient | Pot before roots mat together |
| Brown mushy stem or smell | Trim above rot and restart | Replace soggy medium | Do not wait on rotting tissue |
Use the node as the clock. Pothos roots form from nodes, not from a bare internode. If a cutting has leaves but no node below the water or medium line, it may stay green without rooting.
Pot before roots become a tangle. Long water roots look impressive, but pothos usually adapts better when moved once roots are firm, pale, and beginning to branch around 1 to 3 inches.
What’s going on in there? It’s hard to tell when looking into a glass jar of water. Cut back the vine, stick the node beneath surface, and now. Nothing’s changed. Everything look OK: the stem, the leaves is still perky, but no roots, right?
That’s where math come in. Rather than guess, why not use the things you can control… The factors, and calculate the difference? Week to week, the medium you used; the amount of light or darkness; the humidity or temperature will each push the timeline forward or back by weeks. If you know how they’ll combine, you won’t pull up a perfectly good cutting prematurely. And you won’t watch helplessly as another rotting one sinks.
How to Grow Roots Fast
The node is where all action happens, the little brown bump on the stem from which roots will push forth. And it’s absolutly necessary that this node be buried within your growing medium or at least sitting in water. No matter how long you wait, there will be no roots without that node being in contact with the water or medium.
The calculator considers just how many nodes you’re starting with. Why? Because each node represent an opportunity to succeed or fail independently. A one-node cutting only has half as much surface area to initiate new roots than a two-node cutting. It also has half the leaves. These leaves is responsible for fueling the plant via photosynthesis. But conversely, too many leaf when exposed to poor light will prove harmful. Instead of forcing roots, the plant expends its energy keeping the leaves alive. That’s why the key is finding that happy balance.
The other big variable that many people forget is the medium. For example, water is by far the favorite because you can see what’s going on. There’s instant feedback with water. You can see those white bumps form and then stretch out to become roots. But water roots are delicate and soft. Roots grown in a medium like perlite or even sphagnum moss has to work a little bit harder to locate the moisture, which creates sturdier root system. They’re tougher when they transition into the soil, too.
We use the tool mentioned above to account for this differance. Yes, water may display the roots first, but there’s something else at play: Is it ready to go into its permanent home yet? That root in perlite may not have as many inches, but it will be thicker and denser. It’ll be ready to pot up before that long, wimpy root from the water.
Temperature is the accelerator. Remember that pothos is a tropical plant and loves warmth. Metabolic processes slows way down when you place a jar on a chilly windowsill. Rooting may be twice as slow as if the jar were positioned beside a warm radiator. Take into account your typical surrounding temperature with the calculator. It knows that the warmer the day, the faster the root will initiate. A drafty spot in the winter slows things to a crawl. That’s why propagating during winter seems endless. The plant isn’t dead; it’s simply moving slowly, because growing costs too much energy in the cold.
A second tricky variable is light. Light is another tricky variable. You need enough light for the plant to make food, but too much direct sun will scorch the leaves and dry out the cutting. Pothos do not like full sun or they’ll burn the leaf, but they also want some light to be able to make their food. Ideally, they need bright indirect light. This means having enough light to produce energy but no more, because too much energy from heat or a lack of water causes stress.
The calculator factors in what light you have so it knows roughly how much energy the cuttings is getting from that source. The lighter the leaf, the less chlorophyll there is to produce energy. Variegated plants has even less chlorophyll and therefore less ability to make energy. So a variegated pothos roots slower than a solid green one. It is a simple tradeoff. Beauty costs time.
The one ingredient you can’t purchase is patience. All these cuttings are different; some take off like wildfire; some crawl. Follow the calendar, follow the estimates, but pay attention to what your eye tells you: new growth, firmness in the root. You should of watched for it. When they’re thickening and sending out branches, when their roots have spread, that’s when you pot them up. And not a moment before.