Daylily Bulb Planting Depth Calculator
Estimate daylily crown depth, planting hole depth, root spread, mound height, spacing density, mulch clearance, bed count, and planting risk for bare-root fans, divisions, potted plants, minis, and mature clumps.
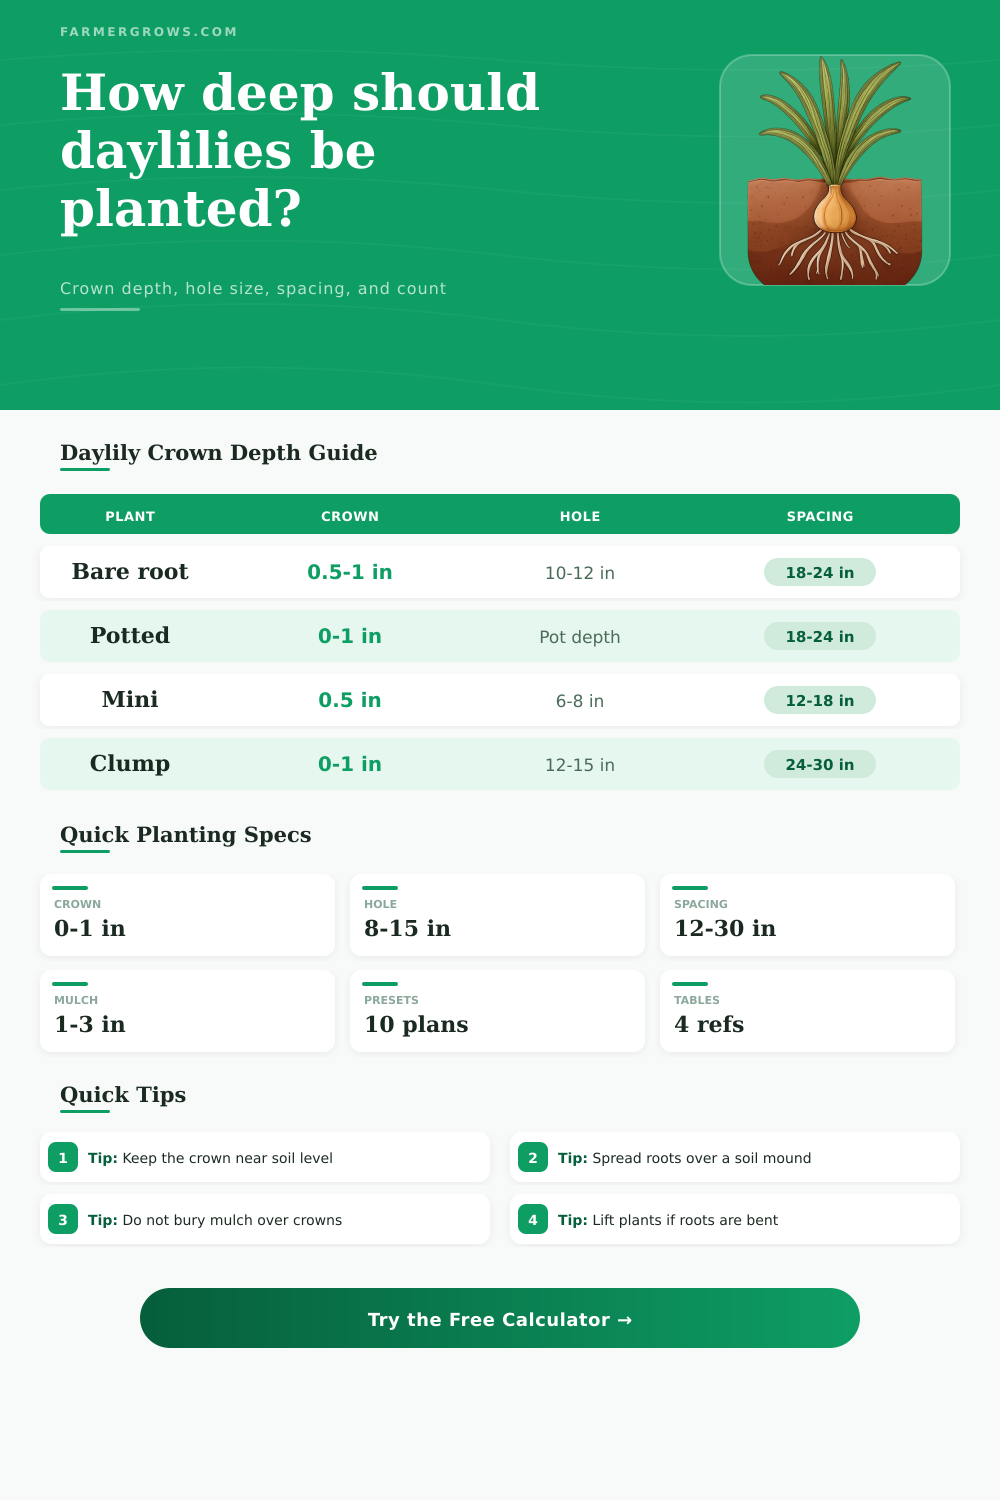
Daylilies are usually sold as bare-root fans, divisions, or potted crowns rather than true bulbs. This calculator keeps the requested bulb-depth workflow, but it bases the planting recommendation on the crown: the point where leaves and roots meet should sit near finished soil level, generally no deeper than about 1 inch below the surface.
📋Daylily Planting Presets
⚖Depth Method Quick Guide
Reports how far the crown should sit below the finished soil surface after watering settles the soil.
Calculates enough room for roots to spread downward over a small mound without bending sharply.
Shows whether planned mulch should be pulled back from the crown instead of counted as soil cover.
Uses spacing and bed dimensions to estimate how many daylily plants fit without crowding.
🌼Planting Inputs
Daylily Planting Depth Results
Your crown depth, hole size, and spacing plan will appear here.
🌱Daylily Type Reference
📊Daylily Planting Reference Tables
Crown Depth and Hole Size Guide
| Daylily form | Recommended crown position | Typical hole depth | Typical hole width |
|---|---|---|---|
| Bare-root single fan | 0.5 to 1 inch below finished soil | 8 to 12 inches | 10 to 14 inches |
| Potted nursery plant | Match pot soil line or slightly high | Rootball depth plus loosened base | 2 times rootball width |
| Fresh garden division | About 0.5 inch below surface | 10 to 14 inches | 12 to 18 inches |
| Large divided clump | 0 to 1 inch below surface | 12 to 15 inches | 18 to 24 inches |
| Miniature daylily | 0 to 0.5 inch below surface | 6 to 8 inches | 8 to 10 inches |
Spacing and Bed Capacity Reference
| Use case | Spacing | Plants per 100 sq ft | Best fit |
|---|---|---|---|
| Tight edging | 12 to 15 inches | 64 to 100 | Mini or small fans |
| Quick border fill | 18 inches | 35 to 44 | Standard cultivars |
| Balanced landscape bed | 22 to 24 inches | 20 to 28 | Most garden daylilies |
| Large clumps or drifts | 28 to 30 inches | 11 to 15 | Vigorous divisions |
Soil, Season, and Mulch Adjustments
| Condition | Depth adjustment | Mulch note | Why it matters |
|---|---|---|---|
| Heavy clay or slow drainage | Set crown slightly higher | Keep mulch away from crown | Reduces crown rot and wet pockets |
| Sandy or fast draining soil | Use the deeper end of shallow range | Mulch helps moisture | Limits drying and wobble |
| Cold-zone fall planting | Do not bury crown deeper | Use loose winter mulch after freeze | Protects against heaving |
| Containers | Match crown to media surface | Thin mulch only | Containers stay wetter and colder |
Common Daylily Bed Plans
| Planting plan | Area or length | Spacing | Estimated plants |
|---|---|---|---|
| Walkway edging row | 20 ft single row | 15 in | 16 plants |
| Small front border | 4 x 10 ft | 20 in | 14 plants |
| Mixed perennial drift | 6 x 12 ft | 24 in | 18 plants |
| Large low-care bank | 10 x 20 ft | 30 in | 32 plants |
💡Planting Calculation Tips
If soil or mulch completely hides the crown, pull material back and recheck after watering settles the plant.
Daylily roots should spread naturally over a mound; bent roots often mean the hole is too shallow or narrow.
Mulch can reduce weeds and winter heaving, but it should not be packed against wet crowns.
Loose soil settles. Lift or backfill while the plant is fresh rather than waiting for growth to stall.
Daylilies are hardy things, but don’t try to grow them if you plant them too deeply. In June, you may think you’ve bought yourself some time by tossing that bare-root fan in the hole, expecting all will be well. But what realy matters isn’t soil quality or how much sun it gets; it’s how deep it goes.
The key point is the crown, where roots meets the foliage. It needs air, but most gardeners pack everything down tightly to keep it in place. When you bury your daylily crown too deeply, it can’t breathe. It won’t succeed without good air flow.
The Right Way to Plant Daylilies
You don’t have to convert anything into something else, or make any guesses about coefficients; all that’s done for you with the calculator (above), which ask you what kind of soil you’re working with and how long your root is. It will ask separately for crown cover (how much it covers) and for hole depth; why? Because they aren’t necessarily the same thing. You want a large hole but only enough height to the side of the hole so roots can spread freely across the top of a slight mound of soil. Ideally, you’d like the roots to hang downward but not bend sharply at the end. Bent roots strangles the plant’s ability to take up water.
After spreading out the roots, backfill around them, and leave just crown exposed by no more than half-an-inch or so beneath the finished surface.
Soil texture changes everything. For example, if yours is heavy clay (which is harder when dry, softer when wet), adjust the crown to be just above what’s recommended for loam. Tight soil holds water longer then you think, so being a bit higher helps avoid rot. If yours is sandy, where things drain quickly, go toward the deeper end of the safe zone with planting; but use aggressive mulching to ensure roots don’t bake out.
The tool takes all this into account in adjusting its risk evaluation. It will warn you if your planned mulch depth threatens to smother crown. Mulch moderates temperatures and suppresses weeds…but becomes an issue when it gets packed right up against the crown in a downpour. That’s where rot begins: those dark, wet pockets where organic matter never dries out.
Many don’t know that space matters as much to their plants’ longterm health as it does today’s appearance. Because we want to see something right away. Daylilies looking “full”. We often plant them too closely together. Daylilies split and spread, too, so if you make things harder on yourself by crowding them initially, you’ll have more mess to untangle come spring.
The calculator will tell you what number of plants will fit in a given area with the spacing you’ve selected. Twenty two inches apart is a nice balance for most average-sized landscape beds; it allows the fans plenty of elbowroom to stretch out (and doesn’t leave big gaps between them). With miniatures, you could go closer (but not touching, since then there’s no air flow and fungal problems is more likely in humid summers).
Fall-planted plants get planted different than spring ones, too: No need to put it in deeper to protect it through winter (you’re trying to beat the first hard frost). Cold soil is not the enemy; wet cold soil is. If the ground freezes before you apply mulch, try to do it then. It will create a cushion that prevents the plant from being kicked out of the ground, which helps stop heaving and the wind-drying of roots. For now, keep the crown shallow at planting time.
Those rules of thumb vary by plant form, as this chart on the page details. With potted things it’s simpler, since you can eyeball where the potting soil stops in the nursery; with bare-root plants, its trickier. Find the crown knot, snip off any gnarly roots, and be sure to cut back the foliage (which would of otherwise go limp waiting for the plant to take hold).
The science part: Shallow crowns push new shoots out sooner than deeper ones (wasting time and energy getting up aboveground). Don’t baby the soil; get that thing going right. The secret is knowing what’s important. What you’re putting in isn’t exactly a bulb (something that only has a few inches of ground cover). You’re putting in crown of a perennial, which wants to be up high.
Soil settles, particularly in a newly made bed, so water it and then check how much depth you have. If you see the crown submerged when wet, pop it up a bit while the soil is still loose. That little trick will pay off each bloom season. Make the root system go down deep, but the crown remain high and you’ll have a good show with no rot.