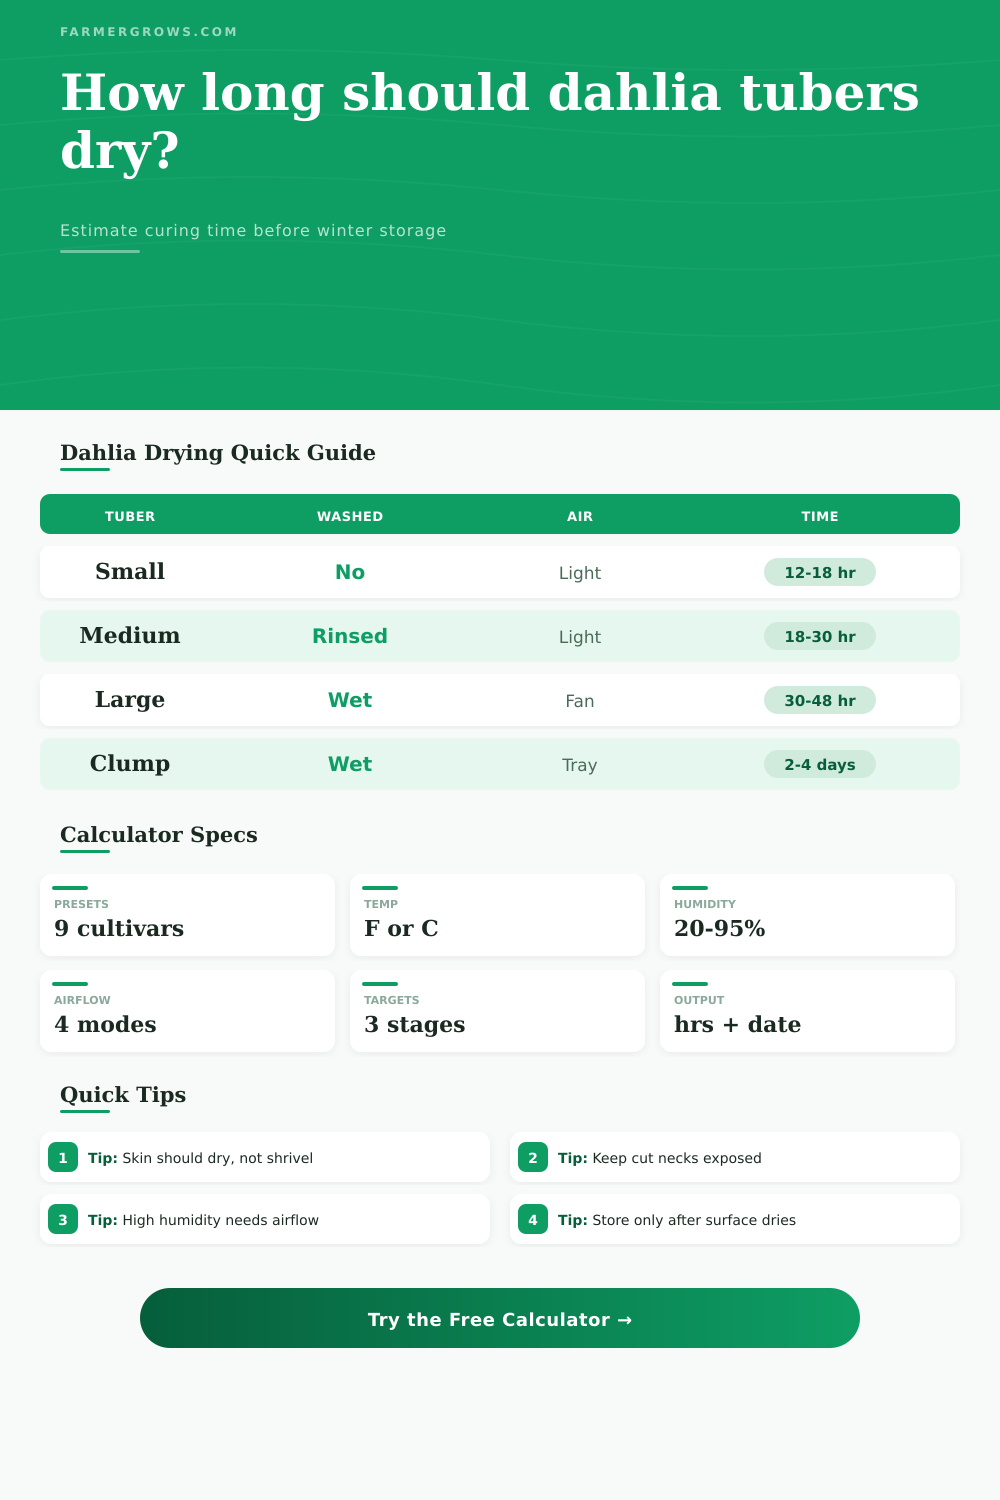
Dahlia Tuber Drying Time Calculator
Estimate how long lifted, washed, divided, or freshly cut dahlia tubers should dry before packing for winter storage.
Pick a real cultivar-style scenario, then adjust the drying room, wash method, cut surfaces, and target before packing tubers into peat, vermiculite, wood shavings, or storage wrap.
Dahlia Drying Estimate
Your drying estimate will appear here.
Air reaches the underside of each tuber. Best for washed divisions and growers curing many labeled varieties.
Cardboard wicks surface moisture but can stay damp under crowded clumps. Rotate heavy tubers once.
Works well for medium lots if layers stay shallow and cut ends are not buried against wet neighbors.
Useful for storage after drying, but risky during curing because trapped humidity slows the surface dry-down.
| Starting condition | Typical add-on | What to inspect | Storage note |
|---|---|---|---|
| Dry brushed, intact | 0 to 4 hours | Soil dust, crown firmness, neck skin | May pack as soon as skin feels dry |
| Rinsed and towel-drained | 4 to 12 hours | Crown creases and around old stem | Keep labels with each division |
| Washed and visibly wet | 10 to 24 hours | Water beads near eyes and cuts | Use airflow before packing medium |
| Muddy whole clump | 24 to 72 hours | Hidden soil pockets and soft necks | Separate or rotate before storage |
| Room condition | Effect on drying | Best use | Watch for |
|---|---|---|---|
| 40 to 45°F, humid | Slow, often 1.5x or more | Holding firm unwashed clumps | Condensation and gray mold |
| 50 to 60°F, 45 to 65% RH | Steady and controlled | Most home curing rooms | Uneven drying in crowded crates |
| 65 to 72°F, low RH | Fast surface drying | Fresh cuts needing quick callus | Shriveled tails and thin necks |
| Over 72°F with high RH | Unstable and risky | Short emergency drying only | Warm rot in wet stem tissue |
| Airflow setup | Drying speed | Good for | Adjustment |
|---|---|---|---|
| No fan, still shelf | Slow | Already dry brushed tubers | Spread wider and check daily |
| Light room circulation | Moderate | Most rinsed dahlia divisions | Use single layers where possible |
| Low fan across room | Fast | Wet crowns and many fresh cuts | Do not blast directly at necks |
| Fan plus dehumidifier | Very fast | Humid garages and rainy lifts | Shorten checks to prevent shrivel |
| Readiness sign | Ready look | Too wet | Too dry |
|---|---|---|---|
| Skin feel | Dry, matte, slightly firm | Glossy or cool-wet patches | Wrinkled and rubbery |
| Cut surfaces | Dull, sealed, not weeping | Fresh shine or sap beads | Deep cracking at cuts |
| Crown and neck | Firm with no soft odor | Soft stem base or damp soil | Thin necks collapsing |
| Storage test | No condensation after 2 hours | Moisture in closed test bag | Tuber tail puckering fast |
Dry for storage, not for crispness. Dahlia tubers should lose surface moisture and seal cuts, but the body still needs enough internal moisture to stay plump through winter.
Separate problem pieces early. Any tuber with a soft neck, sour smell, or wet crown patch should be isolated and rechecked before it goes into the main storage box.
Dig your dahlias (and dahlias are one crop that realy must be dried off asap!). I always forget how long they should dry, so it’s good to know that if they’re still too moist when you pack them away, they’ll rot. Storing moist tubers are a death sentence.
This drying calculator will tell you how long your specific tubers need, given their starting moisture level, the size of each tuber, and the humidity of where you plan to store them. It’s a simple matter of physics: Moisture seeks to move toward heat and air; high humidity slows drying, as does mass. Adjust the conditions (your room has a moderate humidity and a temperature of 60 degrees), and the system recalculate to match.
How to Dry Your Dahlias
Washing off tuber soil to prevent rot adds a heavy moisture burden that increases the time required, because that water needs to be evaporated, too. The calculator factors in the added saturation.
Twelve hours on counter will dry tubers’ surfaces, says the calculator, but do they need three days of deep curing? Drying time depends much on size. On a tray, some small tubers will be ready overnight. Larger dinnerplate types takes longer, because they are heavier and keep moist from inside out.
The surface dries first, but it’s not really safe yet. If you pack a big tuber too soon, the whole thing stay damp inside the storage bin, which means that come spring your crown is all mushy. With a larger clump, this tool buys you a little more time and protects the interior. A tuber can make or break itself with just a few hours of air exposure.
The faster the air flows, the quicker it dries. If the air is still, it gets saturated fast and evaporation are slow. A fan pulls air across surface to remove moisture and blow in fresh air. The calculator favors high airflow. Use of a fan with a dehumidifier will shorten the estimate.
This is useful for when a humidity spike during rainy seasons affects your drying time. You might be able to determine that there is time to spare before first frost arrives.
Dried out does not mean dry. Matte, firm exterior, but cuts seal. Interior flesh is still plumped up, hydrated. Rubber tails mean there is too much drying. Avoid that mistake by using the target range on the tool. That’s your first check time, then your last pack time. Do not just check at one point. To test moisture, feel around neck.
To check the guesses, there are reference tables. Do they show extra time if your divisions is rinsed or lumpy with mud? Wet soil clings to their skin like a sponge. Extra days, not just hours, would of be needed with really mucky tubers. In dry years, maybe a towel-drain is all that’s required. With really wet ones, a strong air flow are called for. The calculator takes care of it.
Tubers are only storable once ready. When dry on top, transfer them to shavings, peat, or vermiculite. Wet-packed tubers perish. A proper storage process is exact to eliminate guesswork. The tool calculates the pack date based off your conditions and starting point.
Drying’s the key to winter, not which medium you use. What matters is how well it cures (see tool to get into its groove). Look for a matte surface. Pack when conditions aren’t right for rot to set in. Protect those springtime blooms, and be patient.