Cactus Cutting Root Time Calculator
Estimate how long a cactus pad, column, offset, or holiday cactus segment may need to callus, root, show new growth, and begin normal watering.
Start with a realistic cactus cutting scenario, then tune the cutting size, temperature, callus time, medium, and watering rhythm to match your bench or windowsill.
Estimated Cactus Rooting Schedule
Adjust the form to calculate a rooting window.
Rooting Breakdown
Warm mineral medium, bright shade, clean plump cutting, dry callus complete, and only light edge moisture after planting.
Fast cactus mix, room temperatures above 65°F, normal humidity, and patience before the first deep watering.
Autumn light, cooler rooms, older corky tissue, or a very large cut face can stretch rooting by several weeks.
Wet peat-heavy mix, fresh unsealed wounds, cool temperatures, soft tissue, and enclosed high humidity make failure more likely.
| Cactus cutting type | Typical callus time | Roots after planting | Best rooting situation |
|---|---|---|---|
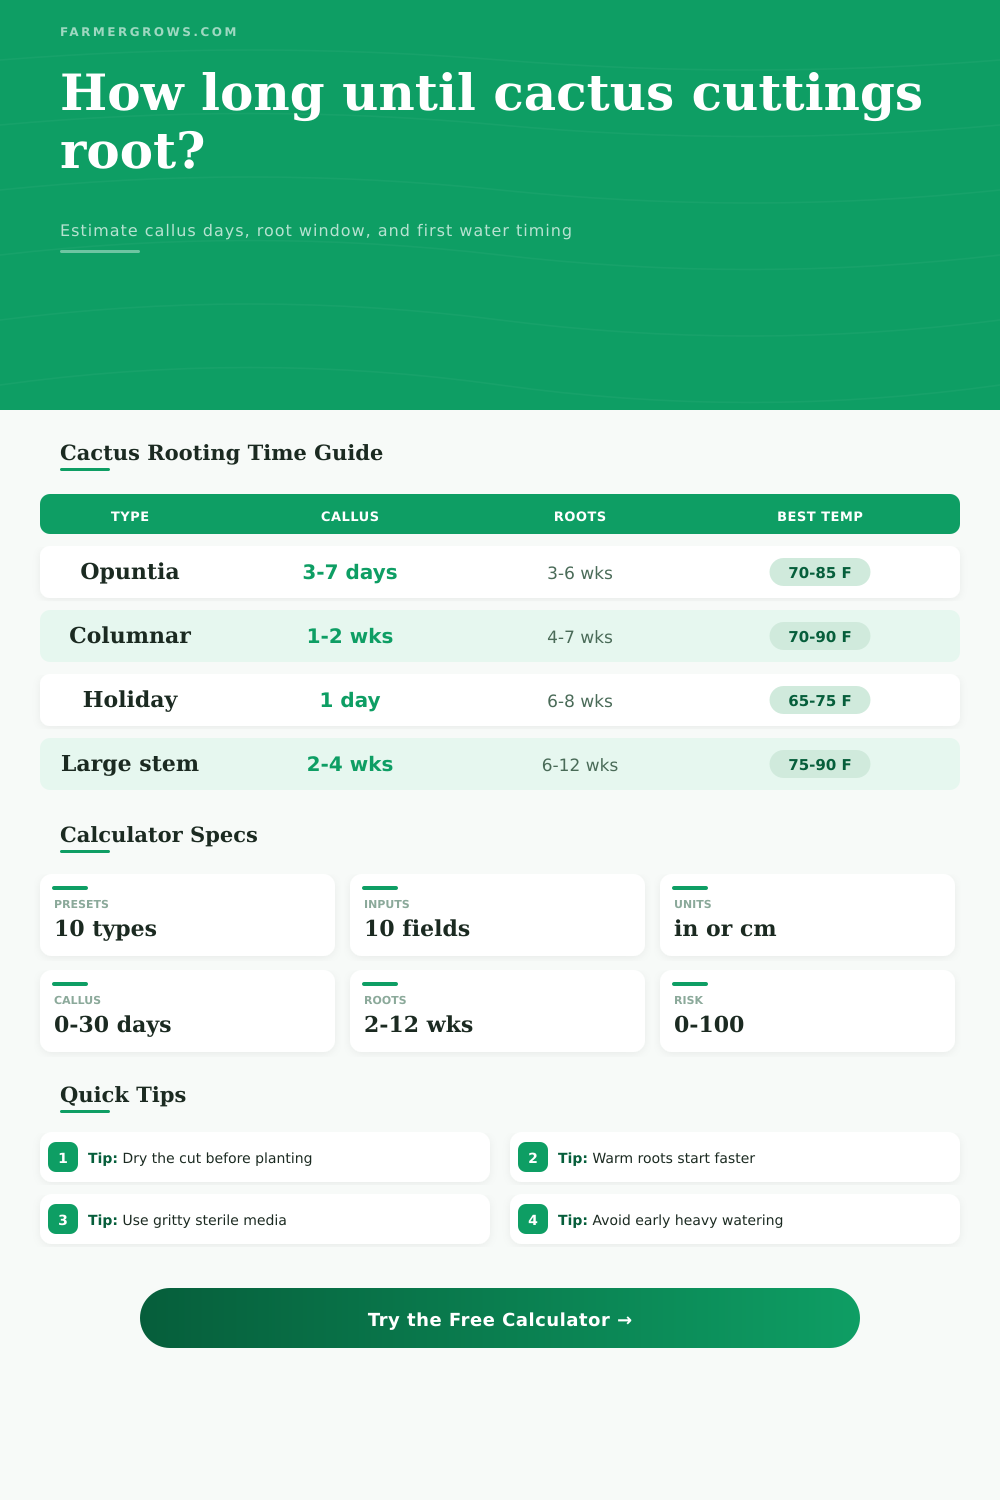
| Opuntia pad or prickly pear | 3-7 dry days for small pads, longer for thick cuts | 3-6 weeks in warm bright shade | Pad set upright in gritty dry mix, then mist edge lightly |
| Common columnar stem | 1-2 weeks until the cut is firm and dry | 4-7 weeks for many healthy columnar cuttings | Warm mineral medium with the stem supported upright |
| Large woody column chunk | 2-4 weeks, especially with a wide cut face | 6-12 weeks when large, corky, or cool | Extra dry callus time, excellent drainage, steady warmth |
| Globular offset or pup | 3-8 days after removal from parent | 3-7 weeks depending on size and firmness | Shallow set in mineral mix with no buried crown |
| Holiday cactus segment | Overnight to 2 days for pinched joints | 6-8 weeks in perlite or coarse sand | Bright indirect light and lightly moist, airy media |
| Average temperature | Rooting effect | Risk note | Calculator adjustment |
|---|---|---|---|
| 50-59°F / 10-15°C | Slow root initiation | Water use is low, rot risk rises if wet | Adds about 55% time |
| 60-69°F / 16-20°C | Acceptable but not fast | Use less water and stronger mineral content | Adds about 15% time |
| 70-85°F / 21-29°C | Best general range for most desert cacti | Keep out of harsh direct sun while rootless | Shortest normal window |
| 86-92°F / 30-33°C | Can be quick if shaded and ventilated | Heat stress can shrivel rootless cuttings | Adds about 10% time |
| Above 92°F / 33°C | Often stalls unless well shaded | High heat plus wet mix can rot fast | Adds about 25% time |
| Medium and moisture | Where it fits | First water guide | Why it matters |
|---|---|---|---|
| Dry pumice, perlite, or coarse sand | Desert cactus pads, stems, and pups | Wait 7-14 days after planting, then mist edge | High oxygen lowers rot pressure while roots form |
| Fast-draining cactus mix | Most home propagation trays | Small sip after 7-10 warm days | Works if it dries quickly between light watering |
| Half perlite, half compost or peat | Cereus and some indoor cactus cuttings | Light moisture only after callus is fully sealed | Retains more water, so watch cool rooms closely |
| Peat-heavy potting mix | Only for tougher or epiphytic material | Delay water and avoid packing the base | Can stay wet around an unrooted cactus base |
| Water rooting or constantly wet media | Mostly epiphytic cactus experiments | Do not use for thick desert cactus stems | Low oxygen and fresh wounds are a risky pair |
| Readiness sign | When to check | What it suggests | Next step |
|---|---|---|---|
| Cut face is dry, firm, and sealed | Before planting | Callus is ready enough for mineral mix | Plant shallowly and support the cutting |
| Gentle tug gives slight resistance | After the first check date | Fine roots may be anchoring the base | Reduce disturbance and begin cautious watering |
| Cutting plumps or holds shape | During the root window | Water uptake may be starting | Keep bright shade and avoid overwatering |
| New areoles, pads, or segment growth | After roots begin | Root system is supporting growth | Transition gradually toward normal care |
Do not rush the wound stage. A thick cactus cutting may look ready above the surface while the cut face still feels cool or damp. Wait until the base is firm, dry, and sealed before it touches mix.
Check roots gently and rarely. Repeated lifting tears new root initials. Use a clear pot, a bamboo support test, or one careful tug after the calculated first-check date.
When you begin with a cactus cutting, there’s certain sort of hope you should of expecting. In a way, the severed stem has already decided whether it will become a plant or not, and most people who try starting one do so in soil (hence, they is called gardeners), with great enthusiasm. And then a week later? It’s all mush.
What’s wrong: Is it the light? Is it the soil? Usually neither. Almost always it’s the wound. A fresh cut is like a door to the rest of the world; fungi and bacteria enters through it. The infection arrives by water.
Why Your Cactus Cutting Is Rotting
Plug in your environment and the size of your cutting, and the calculator does the math. It saves you from guessing about conversions and coefficients. But how does it know what those inputs mean? That’s where biology of the cut comes in.
The callus isn’t just drying. That’s called the formation of a biological seal that will protect the vascular system from rot. The time it takes depend on the thickness and diameter of the cut. It can take several days to set in a thin section like a holiday cactus segment. Thicker sections, like a thick columnar stem, can take up to two weeks. Planting prior to callusing completely is tempting fate.
The calculator bases its guess for that time frame on those two factors, how large and thick is the piece you’ve cut? More interior moisture = more time until all that moisture escapes. That’s why it requests the cut size. You’ll get a different answer with a two inch nub versus a seven-inch pad, even though both may have originated from same mother plant. How long it takes for the exterior to harden depends on how much water there is inside the tissues.
This also has to do with temperature. Root initiation is a metabolic event. In cool weather, metabolism slows. At a chilly 60-degree window-sill, count on twice as much time as you would spend waiting in a cozy greenhouse. The root window built into the calculator reflect this. It’s adding time for the cool conditions. But it isn’t telling you to switch on your heat. It’s telling you to manage your expectations. Expect to wait awhile for roots in winter. Patience is a virtue (and so is understanding what “slow” realy means).
The table on the page spells this out. This reference table shows how different temperatures stretch or compress the timeline, helping you understand when a slow start may simply be a cold one.
After planting, most people mess up how they water and manage moisture. They mist like crazy. They douse the pot in water. They flood the area trying to coax new roots out. That’s counterproductive. Roots want oxygen, too. They need air at their base, not soggy soil. Use a fast-draining mix that’s got some grit so air gets down there but still retains just enough moisture for those precious root hair to reach.
When you set your humidities high and select wet medium, the calculator warns you of rot risk. Think of it as a warning system. Heavy soil + new wounds + high humidity = trouble. The tool helps you see that tradeoff. Want warmth? OK. But if you combine it with wet peat, then you’re without the safety margin.
You get back an estimate of what day to expect it to be rooted and you have a check date and a root window. That date becomes the guide: Go easy with the tug test. Don’t dig it up to see. The roots are still very delicate and clear at first. A bit of resistance signal success. No resistance? Wait a little longer.
And if you want a clue how long until you can water normaly again, the calculator provides that guesswork too. In the meantime, it’s livig off the energy within itself. It’s burning down its own body to create a new one. That’s why the firmness is key. A wrinkly cutting is eating into reserve. A nice plump cutting has lots to use. The calculation considers the initial condition of the tissue. If yours was wrinkling or even spongy-soft to begin with, shift the timeline. Drying out is a tougher fight.
It’s as much art as it is science: propagate. You have your framework in the numbers. Now you have your last piece of confirmation by the hand and eye. And it doesn’t only grow roots; look for signs of new life. If there are new stems or pads, the root system has formed and is growing. So go easy until then. Go bright until then. Go dry until then. Go away from the wind until then.
What keeps the cut protected from rot lets life start anew. And patience isn’t just a virtue but a necessity in this case. It won’t root on your time, it’ll root when it wants to. Trust the wait. Trust the seal. The new life will arrive.