Strawberry Plants Per Square Foot Calculator
Estimate strawberry plant density, row count, starter crowns, replacement plugs, runner pressure, and harvest range for raised beds, hill systems, matted rows, containers, and market-garden strips.
Use this calculator before ordering bare-root crowns or plugs. Strawberry density changes quickly with row spacing, in-row spacing, margins, plant system, expected survival, and whether runners are removed or allowed to fill the bed.
Strawberry Patch Results
Use the starter crown count for ordering. The runner-adjusted total estimates how crowded the patch may become after fill-in.
| Planting system | Plant spacing | Row spacing | Approx plants per sq ft | Best use |
|---|---|---|---|---|
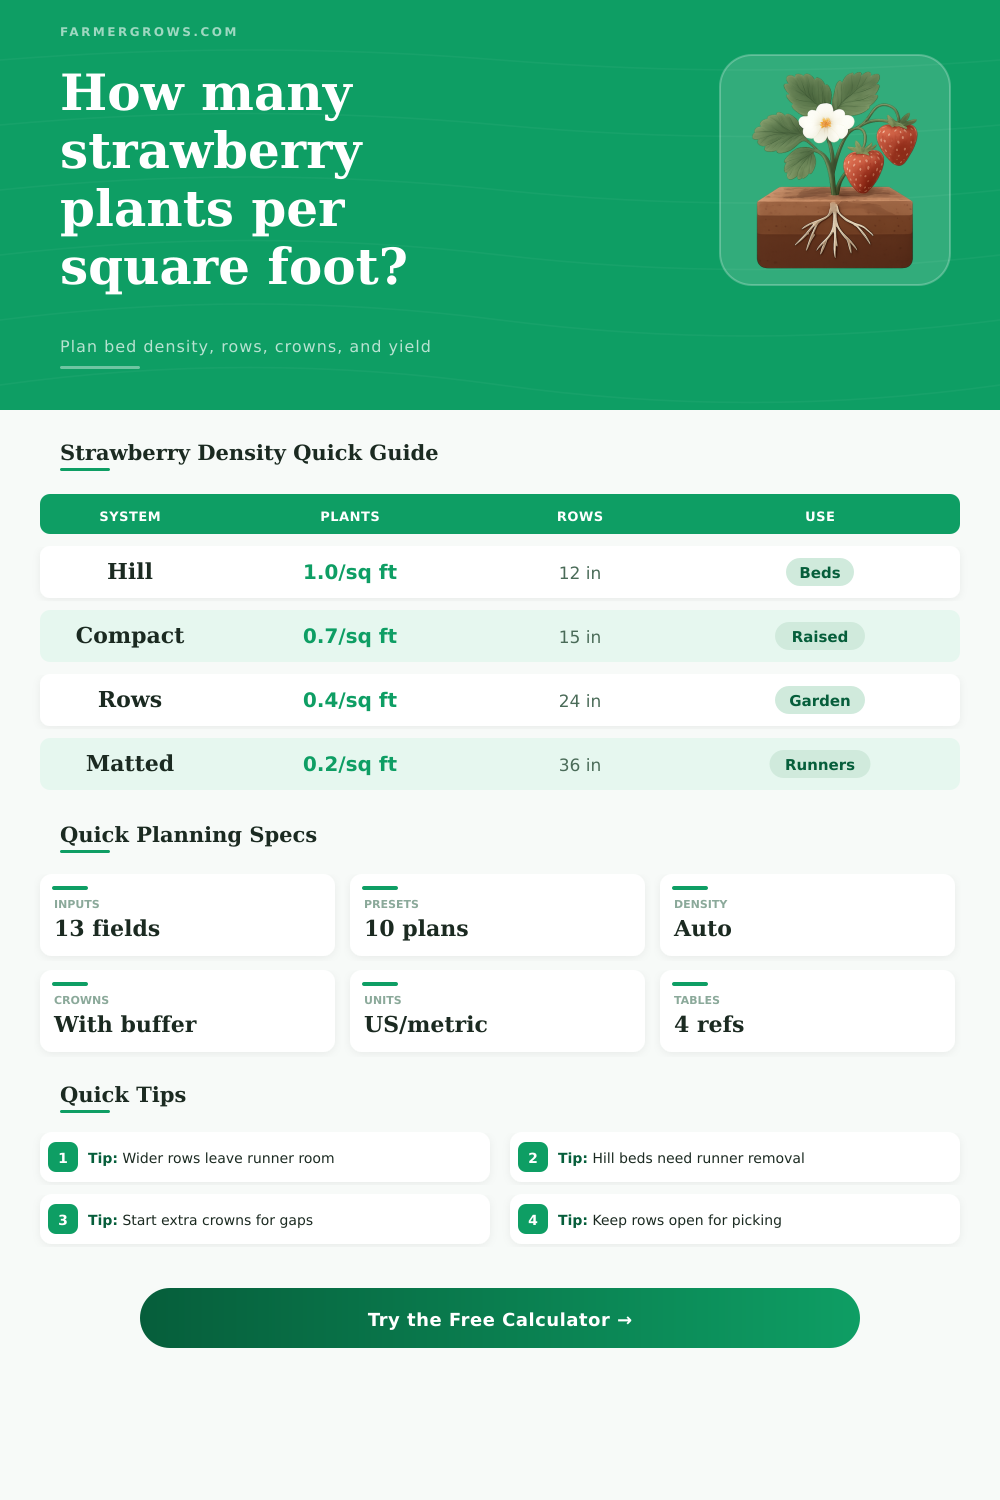
| Hill system | 10 to 12 in | 10 to 15 in | 0.64 to 1.44 | Runner removal, day-neutral berries, intensive raised beds |
| Compact raised bed | 12 to 15 in | 18 to 24 in | 0.40 to 0.67 | Home beds with room to pick and mulch |
| Double-row ribbon | 12 to 18 in | 12 to 18 in pairs | 0.35 to 0.75 | Narrow beds, drip line ribbons, clean rows |
| Matted row | 18 to 24 in | 36 to 48 in | 0.13 to 0.22 | June-bearing patches where runners fill the row |
| Container strip | 10 to 14 in | One row | Depends on width | Planter boxes, grow bags, troughs, and barrels |
| Bed width | 12 in rows | 18 in rows | 24 in rows | 36 in rows |
|---|---|---|---|---|
| 2 ft planter | 2 rows | 1 row | 1 row | 1 row |
| 3 ft narrow bed | 3 rows | 2 rows | 1 to 2 rows | 1 row |
| 4 ft raised bed | 4 rows | 2 to 3 rows | 2 rows | 1 row |
| 5 ft broad bed | 5 rows | 3 rows | 2 rows | 1 to 2 rows |
| Field strip | Too tight for aisles | Bed rows only | Double row | Matted row |
| Row length | 10 in spacing | 12 in spacing | 15 in spacing | 18 in spacing |
|---|---|---|---|---|
| 6 ft row | 7 plants | 6 plants | 5 plants | 4 plants |
| 8 ft row | 9 plants | 8 plants | 6 plants | 5 plants |
| 12 ft row | 14 plants | 12 plants | 9 plants | 8 plants |
| 25 ft row | 30 plants | 25 plants | 20 plants | 16 plants |
| 100 ft row | 120 plants | 100 plants | 80 plants | 66 plants |
| Planning factor | Conservative value | Typical value | Strong value | How to use it |
|---|---|---|---|---|
| Establishment survival | 80% | 90% | 95% | Lower it for heat, delayed planting, or dry bare roots |
| Extra crowns to order | 5% | 10% | 20% | Covers weak crowns, gaps, and replacements |
| Yield per plant | 0.25 lb | 0.75 lb | 1.5 lb | Variety, bed age, care, and density affect fruit load |
| Runner fill allowance | 0% | 25% | 75% | Use only when daughter plants are allowed to root |
| Main harvest window | 2 weeks | 3 weeks | 5 weeks | Longer for day-neutral or staggered varieties |
For high-density hill beds: Plan to remove runners regularly. Dense strawberry plantings are productive only when crowns stay separated, light reaches the canopy, and air can move through leaves.
For matted rows: Buy fewer starter crowns than a solid bed grid would suggest. The goal is to leave enough open soil for daughter plants to root without choking the picking path.
A square-foot calculation probably begins like this: How many strawberry plants can I plant on a square foot? But it’s not as simple than that. How close together you go isn’t an exact science. It’s a negotiation of how much space you have, how low airflow might cause issues like disease, and how much fruit you want compared to how much work you’re willing to do. Enter your preferred spacing, along with the size of your beds, and the calculator does the rest.
It spares you the graph-paper guesswork of whether a tight planting grid is doable or if it will just result in disease-prone foliage. See at a glance what to order (how many crowns) and how much crop to expect.
How to Space Your Strawberry Plants
First big choice: How are you going to grow it? That’s what the rest hinges on. One approach is called a hill system, which means each crown goes in close… Often just twelve inches apart, and then all runners is removed as they appear. This results in nice-looking plant with no runners, neat to pick but lots of maintenance. (Without the clipping, they’ll get tangled up like a mess and the fruit won’t have good air circulation, it’ll rot.)
Or you can use a matted row system, which is exactly opposite. The first plants goes in far apart, say eighteen to two dozen inches between them, and then you abandon control, letting the runners go crazy. The daughter plants will root in place and slowly fill out space, creating a self-renewing carpet of berries. Looks untidy at first but really produces well when mature.
Most plans fail at spacing. Too close together, and your plants will fight for water and nutrition before they bear any fruit. Give them some elbow room so their roots can grows without hitting the roots of nearby plant.
In terms of garden beds, here’s a nice compromise: Raised beds let you plant things closer together than field rows. However, they still leave enough space between plants and include an aisle so you can walk around with a basket during harvest time. That’s what the tool aims to help you visualize: Just choose your desired bed width and margin size, and the tool adjust the number of rows accordingly.
Wider margins make it easier to step into the bed without crushing those edge plants. This means fewer broken stems, which leads directly to a higher yield in week one. Worth it.
One thing people tend to overlook in their plans: survival rate. Remember: bare-root crowns are delicate things. Plant them in sodden ground and they’ll rot; leave them out too long and they may dry out. For this reason, there’s an input on the calculator called “buffer.” Add 10-20 percent more crowns. That isn’t wasteful. That’s purchasing insurance, against weak stock, against bad weather, simply against making a planting mistake.
The last thing you want is to be running around in mid-spring hunting for replacements because all the nurseries sold out. That extra buffer will make sure your garden bed looks full from day one, without any empty spots.
What kind of yield can you expect? That depends not only on the variety, but also on the patch’s health. Even a new planting won’t be at full production until the second (or even third) year. First-year harvest tend to be small; as the saying goes, they’re putting most of their efforts into establishing roots instead of fruits.
Well-tended, established beds, particularly ones that are regularly renovated, can really pay off. If you have day-neutral types, it’s long-season fruit, but the plants needs serious attention to sustain such high production. With June-bearing types, they dump all of theirs quickly (perfect for freezing and jam-making). Understanding these differences will help you set realistic expectations for what your bed will produce over time.
Bottom line: How do you plan for a strawberry patch? Plan for reality, but also for ambition. If you want lots of berries, plan for a dense bed. This will take more effort to maintain production and keep it clean. Or, if you’re willing to be patient, make your bed sparse; then you’ll get to reap the reward when it fills out.
Best practice isn’t always maximum density per square foot. Sustainable productivity over multiple years is what counts. You want a bed whose fruit will reward your efforts…not punish them. Spend less time pulling weeds or battling mold. Spend more time popping fresh berries into your mouth straight from the vine.
That’s why you should of take the time to get the spacing right up front.