Russet Potato Growth Time Calculator
Estimate russet potato emergence, hilling dates, bulking window, main harvest timing, yield, skin set, curing, storage readiness, and baking quality from variety and field conditions.
Russets are not timed like waxy red or yellow potatoes. This planner gives long, netted-skin baking and processing types enough time for hill cover, tuber length, solids, skin set, curing, and storage dormancy.
Russet Growth Schedule
Your russet timing and yield estimate will appear here.
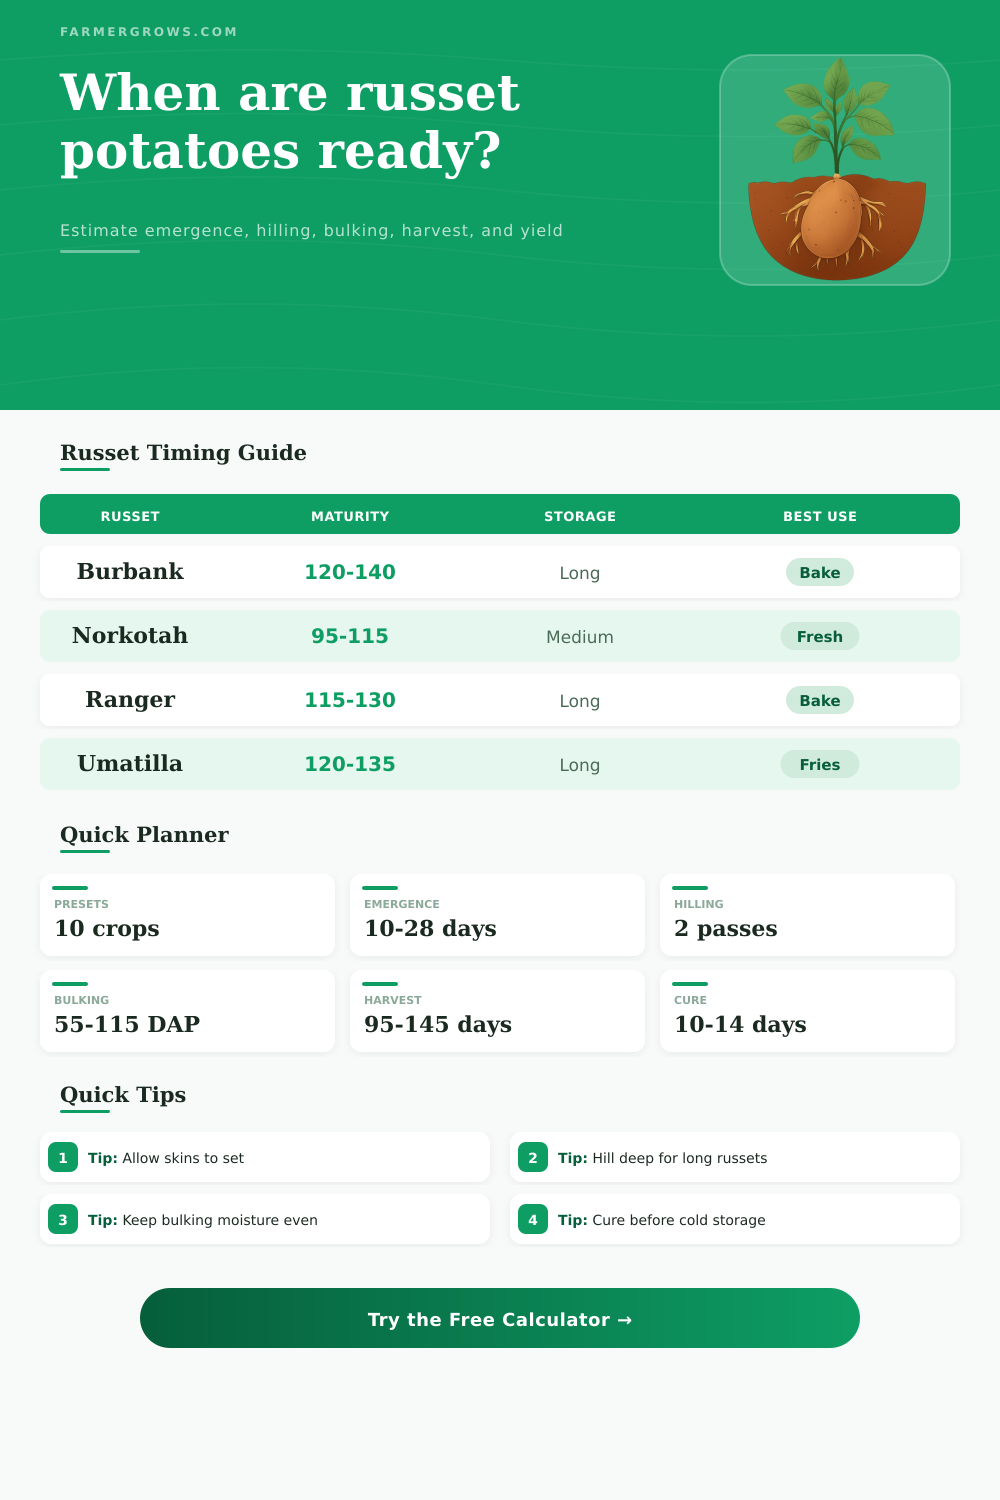
| Russet variety | Typical main harvest | Storage fit | Baking texture |
|---|---|---|---|
| Russet Burbank | 120-140 days after planting | Long dormancy when cured and cooled gradually | High-solids, fluffy baked texture when fully mature |
| Russet Norkotah | 95-115 days after planting | Medium storage; often used fresh before long storage lots | Smooth fresh-market russet, less dry than Burbank |
| Ranger Russet | 115-130 days after planting | Good storage if skins are fully set | Reliable baker with good length and dry matter |
| Umatilla Russet | 120-135 days after planting | Good processing storage under stable temperatures | Strong for fries and baked potatoes |
| Alturas Russet | 125-145 days after planting | Long-season storage crop with strong yield potential | Large tubers; best with a full cool finish |
| Goldrush Russet | 100-120 days after planting | Medium storage for garden harvests | Good home baking potato with earlier finish |
| Stage | Typical timing | Russet-specific check | Management note |
|---|---|---|---|
| Sprout and emergence | 10-28 days after planting | Cold soil delays stands and reduces stem uniformity | Plant healed seed pieces into workable soil above about 45°F |
| First hilling | Plants 6-8 in tall | Protect long stolons and prevent green shoulders | Hill before stems sprawl, then repeat before canopy closure |
| Tuber initiation | 35-55 days after planting | Even moisture improves tuber set and shape | Avoid stress as stolons begin setting tubers |
| Bulking | 55-115 days after planting | Russets build length, solids, and baking quality here | Keep water steady; avoid late lush nitrogen |
| Maturity and skin set | 95-145 days after planting | Skin must resist rubbing before storage | Wait 10-14 days after vine kill for storage potatoes |
| Planting pattern | Best russet use | Expected tuber size | Yield planning range |
|---|---|---|---|
| 30 in rows x 10 in spacing | Smaller garden bakers | More medium tubers | 1.6-2.4 lb per plant |
| 34 in rows x 12 in spacing | Balanced maincrop russets | Good count of baking-size tubers | 2.0-3.0 lb per plant |
| 36 in rows x 14 in spacing | Large bakers and storage | Fewer but larger tubers | 2.4-3.4 lb per plant |
| Container or grow bag | Small trial harvests | Mixed small to medium tubers | 1.0-1.8 lb per plant |
| Processing-style wide rows | Fries and long tubers | Longer tubers with room to size | 2.5-3.8 lb per plant |
| Condition | Timing effect | Quality effect | Russet action |
|---|---|---|---|
| 45-50°F soil at planting | Emergence may stretch past 20 days | Uneven stand can stagger tuber size | Use presprouted seed and avoid saturated soil |
| 60-70°F during bulking | Best sizing pace | Supports shape, solids, and baking texture | Keep moisture even and hills covered |
| Hot finish above 85°F | Can shorten bulking | Lower yield and rougher shape risk | Harvest earlier once skins set if vines collapse |
| 10-14 day cure | Adds handling time after digging | Heals small wounds before storage | Cure dark, humid, and ventilated before cooling |
| Cool dark storage | Extends table life | Reduces sprouting and greening | Store only dry, mature, unbruised russets |
Hill for tuber length: Russets form long tubers that push upward more noticeably than many round potatoes. Build a final 6-10 inch hill before canopy closure to prevent green shoulders.
Do not rush storage: A russet can be full size before it is storage-ready. Allow vines to die or cut them, wait for skin set, dig gently, then cure before long-term cooling.
First you stop checking the daylies, then you stop checking the tomato plants, and eventually you stop checking the potato plants when the foliage gets up off the ground, when it forms a nice canopy. If you fail to time things right or lack patience at that point, you get shrunken roots different than a successful crop of home-grown russets.
Waxy red ones meant for springtime salads? Different story. Long-season crops like these require different planning because they has thickening skin and build up dry matter. The math is worked out on the calculator (above) specifically for your locale and which kind of potato you have in mind. Emergence, hilling, and bulking are not things you should of guess at during critical stages of development.
How to Time Your Potato Harvest
Your single biggest contribution here, the one that probably has the greatest impact; will be the soil temperature when planting occurs. That sets the pace: how fast do those seed pieces sprout and emerge? With chilly late-winter soil, the potatoes has to stay in dormancy awhile before taking off, and the whole timeline get pushed back by weeks as a result. To prevent such a setback, many potato growers prefer to have pre-sprouted seed; others hold off till the top few inches of soil are in what they consider a good range. The timing calculator assumes this fact about you and factors your potential slow start into your projected harvest date.
Because planting late from a cool spell actualy shifts the bulking phase out of the hottest days of summer, this can work to your advantage. Heat stress at the time of tuber development is dangerous: It cause potatoes to take on odd shapes and get bumpy skin, resulting in lower-quality russets that can’t be corrected later.
The next step that matters more than the doing is the timing. You should hill up the stems when they start to spread out but do not do it too soon or you will drown the tubers in soggy soil. To get an idea of what to expect, the calculator tells me when my plants will be big enough to need to be mounded up, this leaves time to work on this most backbreaking chore. Long, brown varieties such as Burbanks or Alturas is especially inclined to green-up at the shoulder, exposing some tuber surface to light, unless properly mounded and kept covered.
Green potatoes aren’t just unsightly; they’re mildly toxic (due to solanine), bitter-tasting, and therefore unmarketable. Covering your tubers will keep whole harvest safe.
When digging up potatoes, the patience part starts once the vines turn yellow and go crispy. Don’t think you’re home free just because the tops are brown; skins don’t set until after the vines start declining or they’ll rub off in storage and cause rot. To avoid loss of harvest by rushing through this period when skins need to firm up, many gardeners get impatient and dig too soon. Breakdowns vary by variety (and other factors). The reference tables on this page break it all down. They shows you whether you’ve dug too early or too late.
This helps you separate the potatoes that aren’t ready to store from the ones that look like they are. How do you cure the harvested tubers? Leave them in a warm, humid spot for at least two weeks to heal any small wounds from the harvest, then move them into cold, but still fairly dry storage. Skip curing and you’ll find yourself with compost instead of a winter’s supply in a month.
With russets, it is less about doing things than about waiting carefully. You plant with hope and hill them with care. You wait impatiently until the calendar says it is time, then you check anyway, until harvest day finally arrives. Knowing the stages helps you feed and water them well when they need it most (not too soon!), without thwarting their naturaly development.
The payoff for all of this digging-in-deep-in-late-summer-or-fall labor is a supply of potatoes that will serve you right into next winter. That means not just good eating but evenly good eating: from first bite to last.